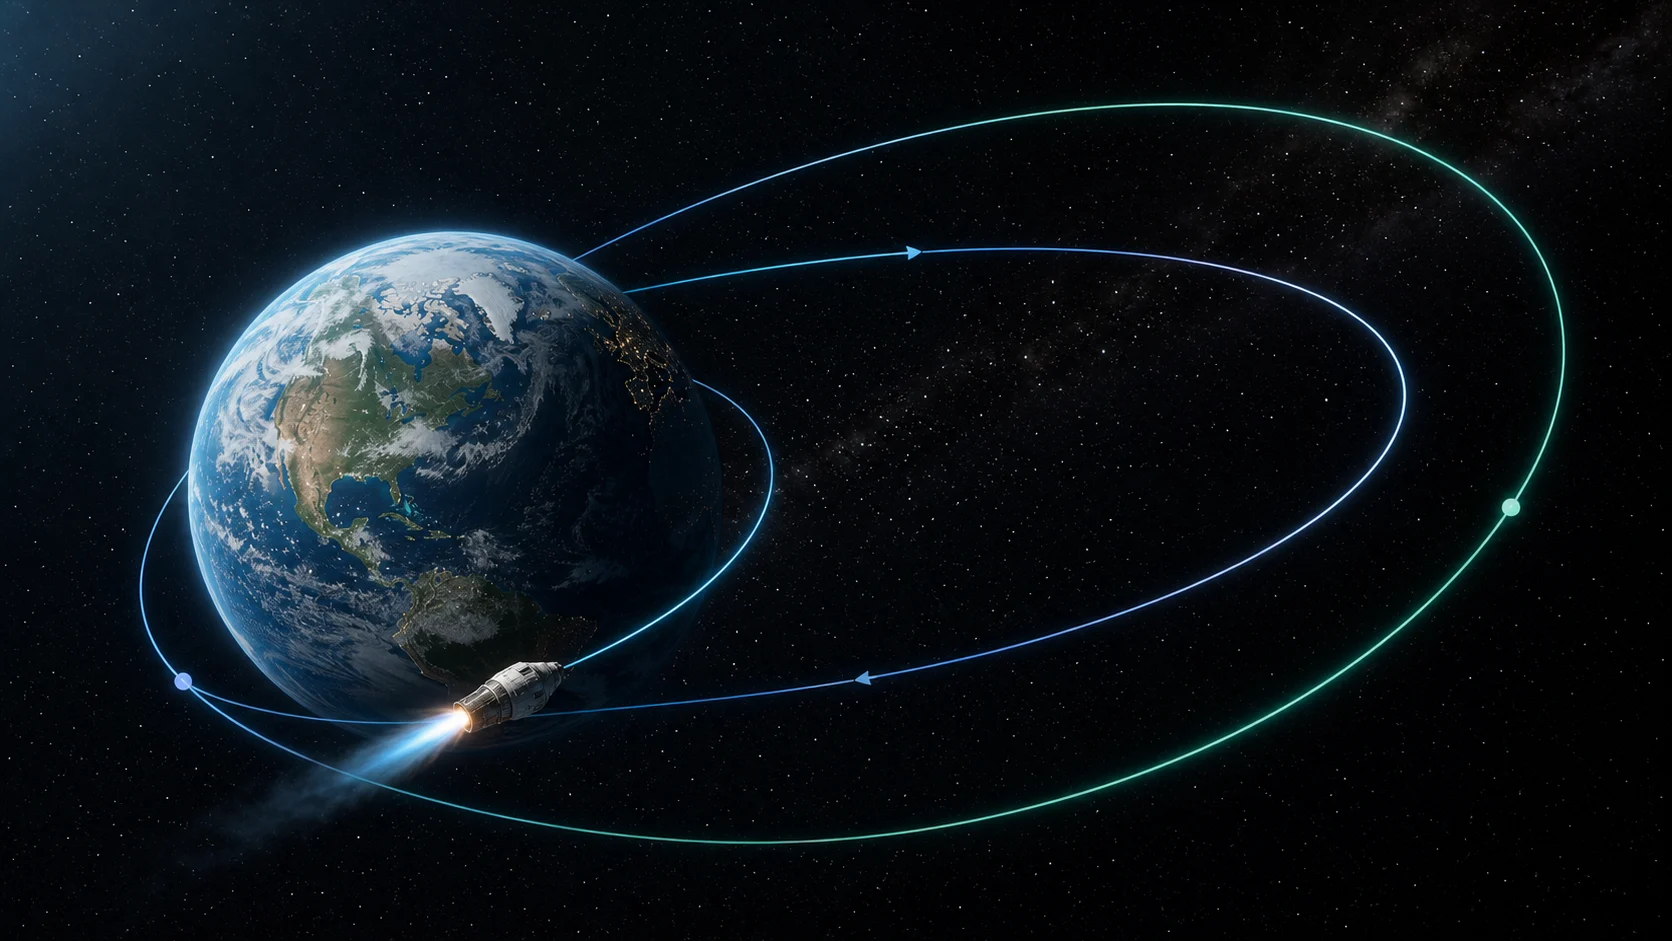
 A transfer ellipse links one circular orbit to another
01The Core Idea
A Hohmann transfer is a two-burn maneuver used to move a spacecraft from one nearly circular orbit to another. The first burn changes the spacecraft from its starting circular orbit into an elliptical transfer orbit. The second burn happens on the opposite side of the ellipse and circularizes the spacecraft into the destination orbit.
The maneuver is famous because it is efficient when the start and destination orbits are in the same plane and reasonably circular. It is not always the fastest route, but it is often the route that uses less propellant. That is why it appears in textbooks, mission planning examples, and interactive orbital tools.
02Why Two Burns?
In orbit, thrust does not work like pushing a car straight up a hill. A spacecraft is always falling around Earth, so a burn changes the shape of its orbit rather than simply moving it to a new height. If the spacecraft burns prograde, in the direction of travel, the opposite side of the orbit rises. If it burns retrograde, the opposite side drops.
That is why the first burn usually happens at the lower orbit. It raises the far side of the path until that far side touches the target orbit. When the spacecraft reaches that high point, a second burn raises the low side and turns the ellipse into a new circle. The same logic works in reverse for lowering orbit, except the burns reduce speed instead of adding it.
03Delta-v In Plain Language
Delta-v means change in velocity. In spaceflight, it is a budget for how much a spacecraft can change its motion. A mission with more available delta-v can perform larger orbit changes, recover from mistakes, or carry extra margin. A mission with less delta-v must be more careful about timing, orbit choice, and burn direction.
A Hohmann transfer is useful because its two burns are easy to estimate. The first burn pays to enter the transfer ellipse. The second burn pays to match the destination orbit. Add them together and you get the approximate delta-v cost of the transfer. This is one of the reasons a simple planner can teach a lot: users can change altitude and immediately see how the cost changes.
04Transfer Time
The spacecraft does not instantly appear in the destination orbit after the first burn. It coasts along half of the transfer ellipse. That coast is part of the maneuver. The higher the destination orbit, the larger the transfer ellipse and the longer the coast time. Moving from low Earth orbit toward geostationary altitude takes hours, not seconds.
This is where many visual simulators become misleading. If the altitude number changes faster than the spacecraft appears to move, users may feel the mission is broken. A good orbital planner should make time and geometry agree. The transfer arc, burn markers, and timeline should all tell the same story.
05When It Works Best
A textbook Hohmann transfer works best between coplanar circular orbits. If the target orbit has a different inclination, the spacecraft also needs a plane change. Plane changes are expensive because they rotate the velocity vector rather than simply adding or subtracting speed along the path.
Real missions often combine maneuvers. A spacecraft may raise apogee, wait, adjust inclination near apogee where velocity is lower, then circularize later. Mission designers care about propellant, time, lighting, communication windows, thermal constraints, and safety. The Hohmann transfer is the clean foundation, not the entire mission plan.
06LEO To GEO Example
A common example is moving from low Earth orbit to a geostationary transfer orbit. The first burn raises apogee to geostationary altitude. The spacecraft then coasts upward, moving slower as it climbs. At apogee, a second burn raises perigee and circularizes the orbit. If the final orbit must be geostationary, inclination also has to be reduced near the equator.
That final step is why launch site latitude matters. A launch from near the equator starts with a smaller inclination penalty for geostationary missions. A launch from higher latitude may need more energy later. Hohmann transfers are therefore connected not only to spacecraft design, but also to geography, launch azimuth, and mission economics.
07Common Mistakes
The first mistake is thinking higher orbit always means faster. In circular orbit, higher altitude usually means lower orbital speed and a longer period. The spacecraft needs energy to climb, but once it is in a higher circular orbit it moves more slowly around Earth.
The second mistake is treating the transfer ellipse as decoration. It is the actual orbit after the first burn. The spacecraft is not "between orbits" in a vague sense; it is following a new elliptical orbit that intersects both the starting and destination circles. The third mistake is ignoring timing. Burns must occur at the right point in the orbit. A correct burn in the wrong place gives the wrong path.
08How To Read It In A Planner
In Jewawud's Orbital Mechanics Planner, a good Hohmann transfer display should help users connect numbers to shape. Starting altitude, target altitude, delta-v, transfer time, perigee, apogee, and burn sequence should agree visually. If the app says the apogee is 35,786 km, the transfer arc should visibly reach the high orbit. If the burn is prograde, the destination side of the orbit should rise.
The most useful interface does not bury users in equations. It lets them manipulate the mission and then shows what the math means. That is why callouts for altitude, burn points, and orbit labels matter. They turn a formula into a cockpit-like mental model.
09What The Diagram Does Not Show
A clean Hohmann diagram usually hides several real mission details. It does not show that engines need finite time to burn, that the spacecraft may coast through lighting and communication constraints, or that operations teams need margins for navigation uncertainty. Textbook diagrams often treat burns as instant impulses. That is fine for learning the shape of the maneuver, but real vehicles have engines that produce thrust over seconds or minutes.
The diagram also assumes the two orbits share the same plane. If the spacecraft must change inclination, the cost can be large. Mission designers often prefer to combine a plane change with another burn or perform it where the spacecraft is moving more slowly. That is why high-apogee transfer orbits can be useful: the spacecraft is slow near apogee, so rotating the orbital plane can cost less than doing the same change in a fast low orbit.
Another hidden detail is phasing. If the goal is to rendezvous with a space station or satellite, reaching the same altitude is not enough. The spacecraft must arrive at the same place at the same time. That may require waiting in a parking orbit, performing small correction burns, or choosing a transfer window. In other words, a Hohmann transfer can solve the altitude problem while leaving the timing problem for the next part of the mission.
This is why interactive planning is valuable. A static article explains the rule, but a planner lets users feel the consequences. Increase the target altitude and the ellipse grows. Change the start orbit and the burn cost shifts. Add a timeline and the maneuver stops being a cartoon. It becomes a sequence: burn, coast, circularize, verify, and then continue the mission.
10Learning Checklist
When you test a transfer in a simulator, ask four questions. Where is the first burn? Where does the transfer ellipse touch the destination orbit? How long is the coast? What does the second burn change? If the answers are visible, the tool is doing its job.
Also watch the direction of the maneuver. Raising orbit usually starts with adding speed, which raises the opposite side of the orbit. Lowering orbit usually starts with reducing speed, which lowers the opposite side. That one rule unlocks a surprising amount of orbital intuition. Once it clicks, transfer diagrams stop looking like magic and start looking like cause and effect.
FAQQuick Questions
Is a Hohmann transfer always best? No. It is efficient for many simple orbit changes, but faster transfers, low-thrust spirals, or complex missions may use different strategies.
Why is the transfer elliptical? Because one burn changes one side of the orbit more than the other. The ellipse touches the start orbit at one end and the target orbit at the other.
Can it change inclination? Not by itself. Inclination changes require a plane-change component or a separate maneuver.
Try It In Orbital Planner
Change target altitude and watch the burn cost, transfer arc, and coast time shift together.
Open Orbital Planner